I have purchased a new SSD, how do I prepare it for use in Windows?

If there is something that is never left over on a computer, that is storage space. We handle increasingly larger amounts of data: personal photos, series and movies that we save on the computer, files that we download from the Internet, etc. This causes, little by little, the computer’s hard drives (or SSD) to fill up, leaving us without space, and generating the need to get more storage space. Classic hard drives are almost out of use, since what we always buy now are SSDs, since they are much faster, more reliable and quieter.
SSDs are now found in all devices: from laptops and desktops to the latest generation of video game consoles. Thanks to them we can achieve extremely high speeds in a size (and weight) much smaller than conventional hard drives.
However, it is very likely that, after having bought one, and having installed it on our PC or laptop, we have found that Windows can’t detect it, and it does not appear as a new drive within the file explorer. What is happening then?
New SSDs come unformatted
The reason why this happens is very simple: when we buy an SSD, it usually comes without any type of format or partition table, so when we connect it to the computer, Windows has detected it without problems, but It has nothing to show us, since it is raw.
In order to use it, it is necessary to make certain basic configurations. The first of them is initialize it to prepare it for the computer to start using it. As part of this, we must assign a partition table to it (usually GPT), and create at least one main partition with a format (NTFS) to start using it.
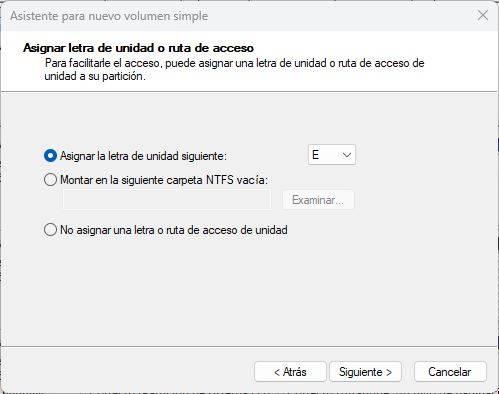
We must also give it a drive letter (if you do not receive it automatically) so that, from that moment, we can start using the unit.
How to prepare an SSD for use in Windows
Although the above may sound complicated at first glance, it is actually quite simple to do. Starting from the fact that we have already installed the new SSD in the computer, and we have turned on the computer with Windows, we are going to prepare the unit.
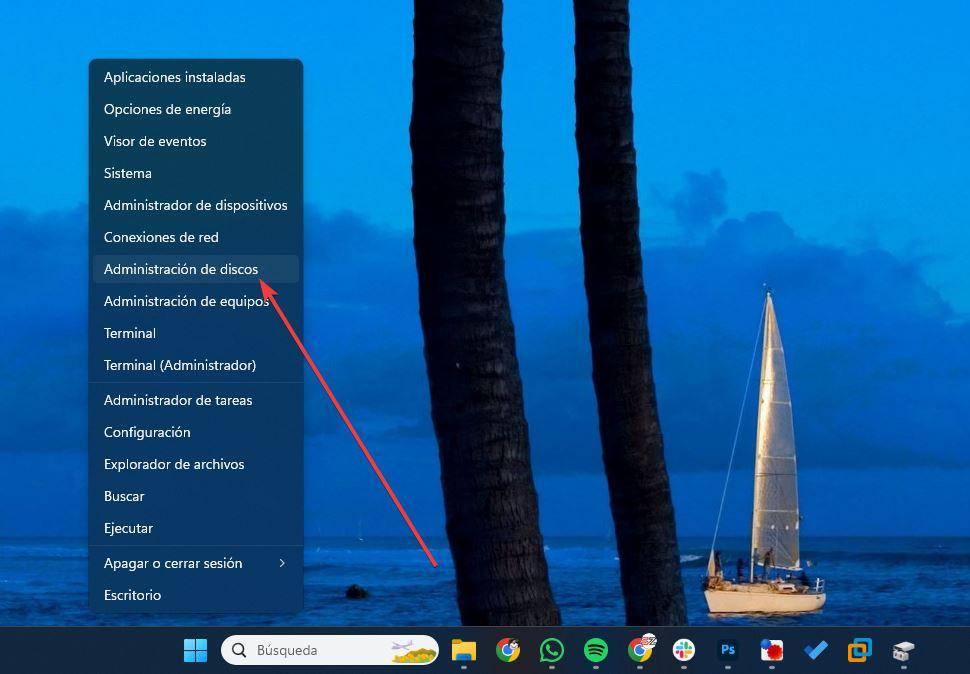
Although we can use partition software, we are going to do it from the disk manager that Windows itself has. There are several ways to get to it. The simplest is to right-click on the start menu button and choose the “Disk Management” option.
Once opened, all the units that we have connected to the PC will appear. The new SSD will appear without an assigned drive letter, without a partition, and also with the color black, as in the following example.
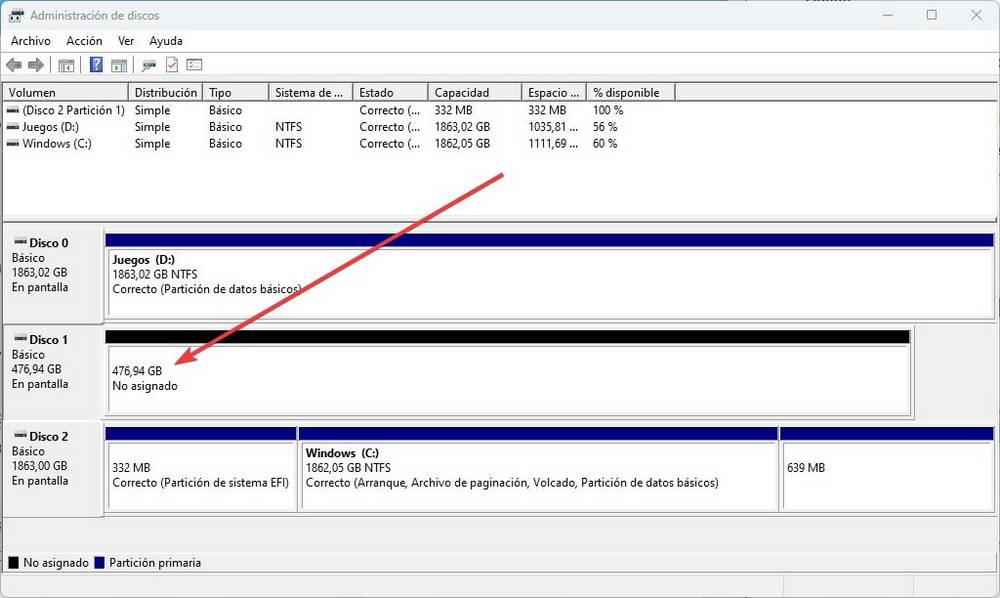
What we will do next is right-click on the disk icon that appears to the left of the black bar, and we will choose the “Initialize disk” option. A very simple wizard will appear where we will have to choose the type of partition table we want to use. We recommend choosing GPT, and saving the changes.
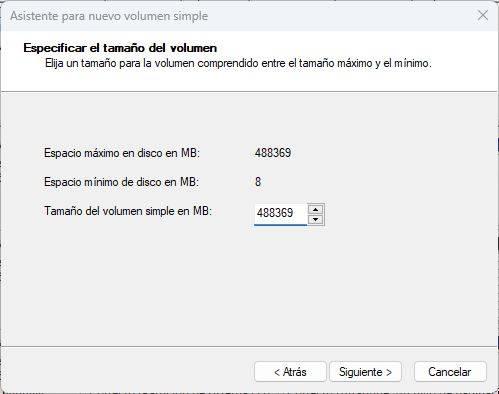
We already have the partition table, now we have to create a partition. We right-click on the black stripe on the drive and choose “New Simple Volume.” A simple wizard will load us from which we can create the unit. We will have to choose the capacity we want the partition to have (in our case, 100% of the size), the letter we want to give it, and the format we are going to use.
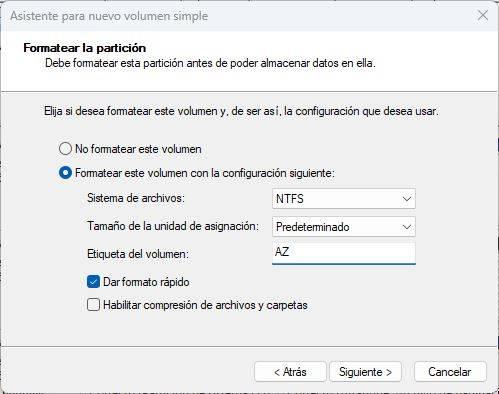
We will choose the file system we are going to use (NTFS), the size of the cluster (default), and the name we want the unit to have. Once all that is done, we click on “Finish”, and wait a few seconds for the PC to format the drive and leave it ready to use.
When finished, a Windows file explorer window will open with our new SSD. And it will appear, along with the other hard drives, within the explorer itself.
